Showing posts with label DIY. Show all posts

Tuesday, October 28, 2014

Rainbow Butterflies

I have wanted Miss A and Little J to be Thing 1 and Thing 2 for awhile, but until this year Little J just didn't quite have the hair. So this year I was excited that they could be Things 1 and 2. E was even going to dress up as the Cat in the Hat. But Miss A and Little J wanted nothing to do with that plan. They wanted to be princesses. We compromised on butterflies. Miss A wanted to be a rainbow butterfly, and Little J wanted to be a purple butterfly.

I really like to make Halloween costumes for the girls, but my crafting skills are a little more MacGyver than Martha. I can't sew, so I have to be creative when it comes to costume creation. Previous costumes include a cupcake, owl, peacock, octopus, witch and lion. For the butterflies I used this pin as inspiration, took the girls to JoAnn Fabrics to pick up supplies and started on some butterfly costumes. I made Miss A's costume first, and when Little J saw it, she decided to be a rainbow butterfly too. As I made the second costume I remembered to take a few photos along the way (until it got late and I got tired and forgetful).

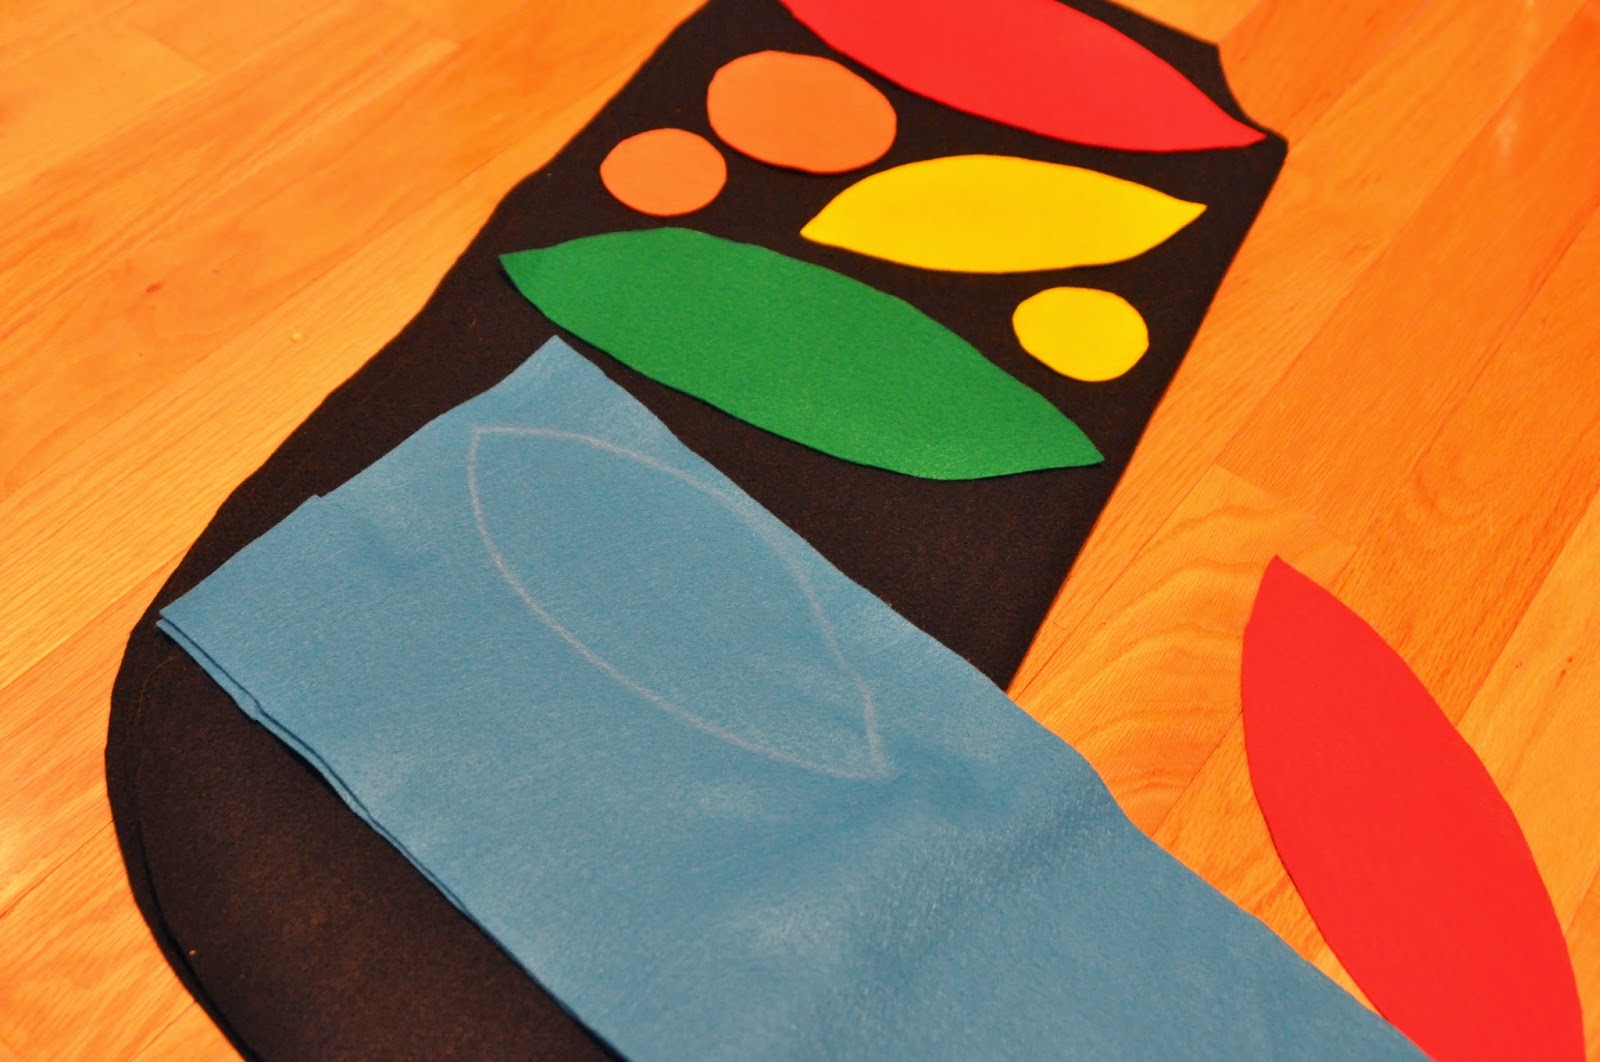
I started with a big piece of black felt. I held it up against Little J to see how long it should be, then used white chalk to mark a line to cut. I made a big U shape to start, then used a t-shirt to measure a good size for the head/neck to go through. Next I started cutting out different shapes from other colored felt to make the butterfly design. I did one of each shape to start to make sure the whole rainbow would fit.

Luckily, I had a super cute helper throughout the process :)


After I had the design laid out on one wing, I cut out 3 more felt pieces of each color.


Here's where I stopped taking pictures. Oops! With all of the pieces ready to go, I laid out the design on the front of the costume then glued everything down with my hot glue gun. I went through a lot of glue sticks, but after our first outing everything seemed to hold pretty well. Once the glue dried, the girls tried on their costumes and loved them! They wore black leggings and long sleeved shirts under the costumes at a Halloween party we went to, then added big sweatshirts underneath at night. The costumes are easy for a variety of temperatures, perfect for Minnesota in October.

A super easy, super cute, Halloween costume!


Thursday, July 24, 2014

Happy Box

One of my very best friends lives way across the country.  She also happens to be the queen of sending awesome mail (seriously... right down to the perfect stamps).  Knowing that she's going through an emotional time, I thought we could send her some extra fun mail to help brighten her day.

I think I saw this idea in a magazine or online a long time ago, but I can't remember where.  Anyway the idea stuck with me.  For our Happy Box, we picked up a bunch of items with one thing in common, they all had to be yellow.  There were a few things I had in mind before we went shopping specific to my friend (like post it notes and washi tape) but otherwise I told the girls to help me keep an eye out for things that were yellow as we walked around Target (the Dollar Spot was a big help!).  


Here's what we found

  • Lemon Heads
  • Juicy Fruit
  • Peanut M&Ms
  • Days of the Week List Pad
  • Post It Notes
  • Yellow Index Card Ring
  • Washi Tape
  • Paper Straws
  • Sidewalk Chalk
  • Punch Balloon
  • Mini Squirt Gun
  • Burt's Bees Chapstick
There were a lot of other things we saw as we shopped, but these seemed like good things to send in the mail.  When we were done, we put everything in a big envelope and sent it off (I would have preferred putting it in a box for a nice presentation, but I couldn't find the right size box at our house, and wanted to get it in the mail quickly, so we went with an envelope).  I hope it brings a burst of extra sunshine and happiness to my sweet friend!

Thursday, May 8, 2014

Mother's Day Teacups

Earlier this spring, I shared about Miss A's Tea Party.  One of the activities for the kids at the party was to decorate their own tea cups. I bought the tea cups for the girls to decorate before getting RSVPs for the party, so I ended up with a few extras.  Instead of returning them, I decided they would make fun, easy DIY gifts for the grandmas (and myself... there was one cup left).  So if you're a grandma, stop reading now.  

I wrote We (Heart) Grandma/Nana/Mommy on each tea cup, then Miss A decorated the cup, and Little J decorated the plate.  We used the Sharpie Oil Based Paint Markers, which we still had from Miss A's party.


After the girls decorated the cups, I baked them to set the color (this post gives a good description of what to do).  Looking back, I probably would have skipped the baking step for this project.  The colors got a little darker after baking the cups, and the pink and purple now look a lot alike.  Since these tea cups aren't for regular use, it probably would have been fine to skip the baking.  We also might have been able to use regular Sharpie markers because the cups won't be washed regularly.  

With the tea cups decorated, we headed to a local garden center to pick out some plants.  I am not great at keeping plants alive, so we waited until this week to add the plants to the cups.  Miss A picked out the plant she wanted for each cup.  We went with succulents, hoping they will survive well in the tea cups.  


Here is our final product.  I think they look pretty cute.  Hopefully the grandmas will like them too!


Have a great Mother's Day this weekend!

Monday, December 9, 2013

DIY Play Kitchen

I've started putting this post together several times, but have never seemed to get it done.  Finally, a year after we made our play kitchen, a post on what we did.

I remember seeing a few DIY play kitchens around the blog world back in the days before Pinterest, and I immediately knew it was something I wanted to do.  Luckily, my husband is quite handy, so he was able to help me make it happen.

We visited a nearby thrift store a couple of times, and eventually found this TV stand.  E picked it out and thought it would be a good choice because it would fit well in our kitchen and it came with a shelf that could be used as an oven door.


I'm kicking myself now for not taking more photos of the process, but here's a quick summary of what we did.  I lightly sanded, primed and painted the entire TV stand.  I decided to paint our play kitchen white because it would fit in with any room in our house pretty easily.


E cut a circle whole in the top of the TV stand, and we put a metal bowl in to use as the sink.  For the faucet and handles we used a wooden J and dowels from Michael's.  I spray painted them silver and E figured out how to attach them.  We also got 4 round plates (kind of like this) to use as the burners for the stove.  I painted a grey square (paint left over from Miss A's room) on the top to be the stove.  Next I spray painted the burners black and drew silver circles on them.  When everything was dry, I used Gorilla Glue to attach the burners to the stove.

We picked out hardware for the play kitchen at Menard's.  They only had basic colors, so I spray painted everything pink.  We used some other wood pieced from Michael's to make knobs and buttons for the oven.  E attached the extra shelf that came with the TV stand and an extra railing piece from our deck to make the oven.  I used the grey paint to add an oven window.


I'm not sure what the oven rack was from, but E found it in our garage.  All I had to do was clean it up and add a fresh coat of paint.  The little shelves from the TV stand were missing when we got it, so E found some extra wood to make two little shelves.


We were able to finish up (most) of the play kitchen to give to the girls as a joint Christmas gift last year.  We told family members that they were getting it so others got them play food and other kitchen accessories.  The play kitchen has been a big hit with the girls!  We have it in our kitchen so the girls can play while I'm making dinner.  Little J especially likes to mimic what Mommy's doing.


Tuesday, June 11, 2013

DIY Picnic Table for Little Ones

If I haven't mentioned it before, I should now.  My husband is amazing.  He is super handy, so he's able to fix most things I break, and build awesome new things for us too (most impressively, our deck). One Saturday morning this spring, E came downstairs and said, "I'm thinking about building a picnic table," then he added, "for the kids." I think at first I probably gave him a funny look, but after thinking about it for a few seconds, I couldn't imagine how we had gone so long without a picnic table.

So the next morning we were off to Menard's to get supplies for a few other projects around the house, and of course we had to pick up supplies for the picnic table too!  Good thing the girls are easily bribed with goldfish, or I'm not sure how these trips would get done.
 A couple weeks later, E woke up on a (finally) nice Saturday morning and got to work.  Luckily Papa was in town, so he was able to help E.  Miss A was on hand to supervise the work.  The building actually went quite quickly.  So quickly that I didn't get any pictures of the building in progress, but below you can see E and Little J testing out the new table.
 For my part of the project, I decided it should be painted a fun color.  I wanted a teal kind of color, but as soon as E mentioned making a picnic table, Miss A was convinced it should be a purple picnic table.  After weeks of negotiations, I won, and we got a teal-ish picnic table (it actually looks bright light blue most of the time... but I'm happy with the color, and happy it's not purple).

Miss A helped me paint the picnic table, and she was actually a great little helper.  I was nervous getting started that she would get paint all over everything, or lose interest after five minutes, but she really stuck with it.  She helped me get the entire first coat on, with surprisingly little paint spilled.
And here's our finished product!  It's already been used for outside lunches and dinners, and a little crafting. I'm sure it will get a lot more use while the girls and I are home this summer.
In total, I think we spent around $50 on materials for the picnic table (wood, bolts, paint).  A friend of mine told me she paid over $200 for a similar picnic table on Craig's List, so I'm feeling pretty good about ours!